 Save
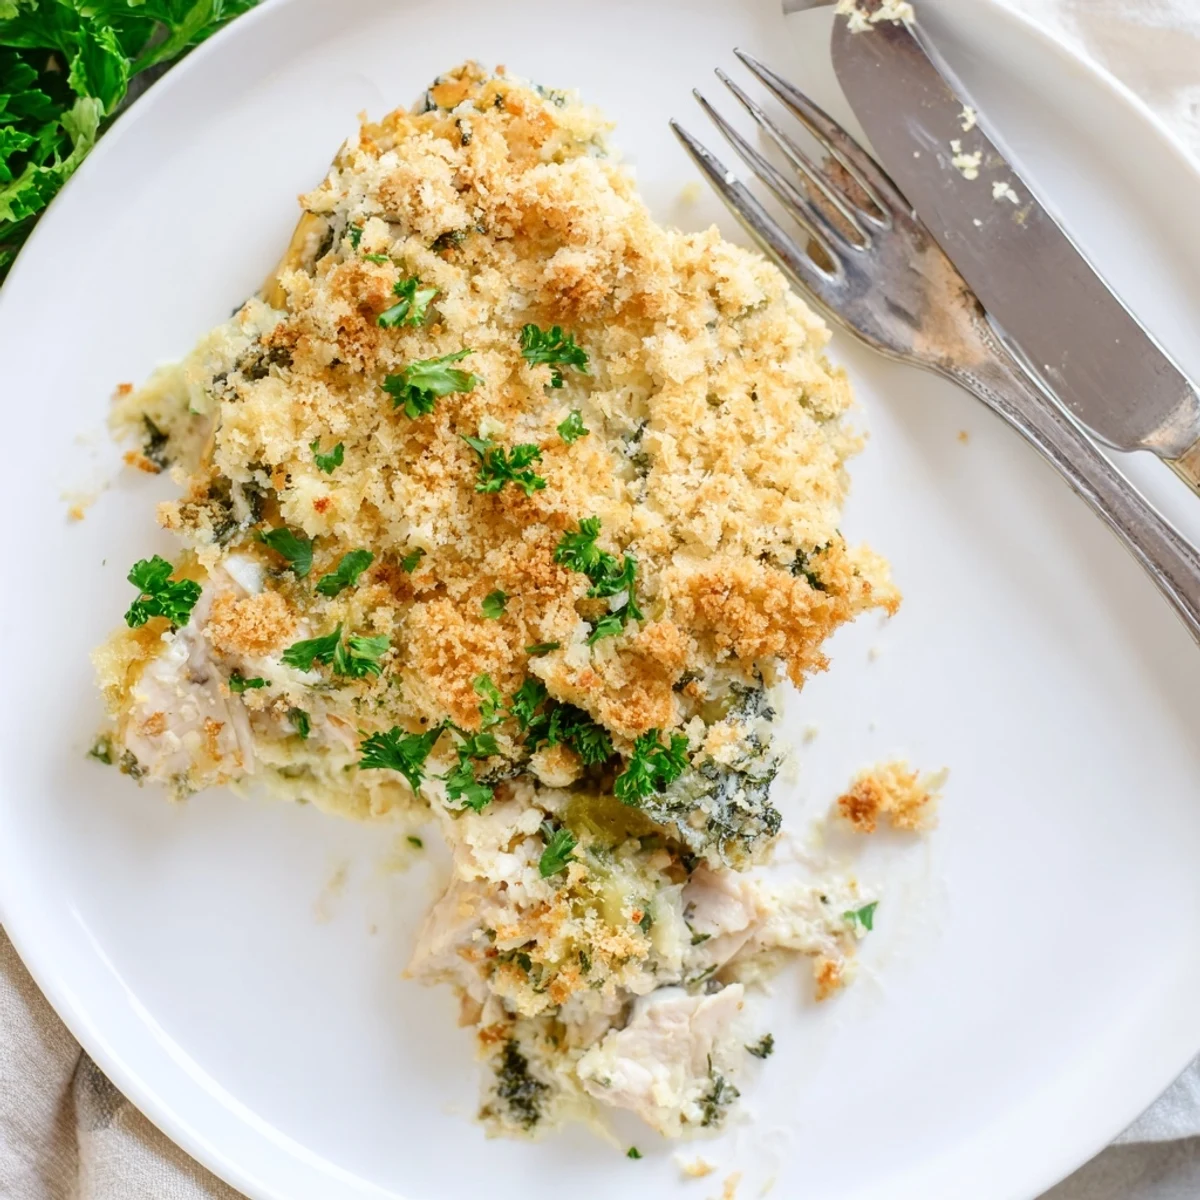
Save This deconstructed Chicken Kiev casserole transforms the classic Eastern European dish into an effortless one-pan bake. Juicy chicken pieces are nestled in a rich garlic-herb butter sauce, then crowned with a golden Parmesan and panko breadcrumb crust.
Ready in under an hour with just 20 minutes of prep, it's an ideal weeknight dinner that delivers all the comforting flavors of traditional Chicken Kiev without the fuss of rolling and frying.
My oven clicker broke the night I decided to tackle Chicken Kiev for a dinner party, and the thought of pounding forty cutlets sent me straight to the casserole route instead. That malfunction turned out to be a gift because what landed on the table was everything I loved about Kiev, the herb butter, the crunch, the golden juices, without any of the fuss. Now this deconstructed version is the only one my family asks for. It has the soul of the original wrapped in weeknight practicality.
My neighbor Dave once leaned over the fence while I was pulling this out of the oven and asked if I was running a restaurant. I handed him a plate over the fence and watched him eat it standing in his yard with a plastic fork. He brought the plate back clean.
Ingredients
- 1.5 lbs boneless skinless chicken breasts, cut into bite sized pieces: Cutting the chicken small means every piece gets coated in that buttery sauce and cooks through evenly without drying out.
- 6 tbsp unsalted butter, softened: This is the heart of the dish so use good butter, the kind you would spread on warm bread.
- 3 garlic cloves, minced: Fresh garlic only here, the jarred stuff cannot compete with the smell that will fill your kitchen.
- 2 tbsp fresh parsley, chopped: Flat leaf or curly both work but flat leaf gives a cleaner brighter flavor.
- 1 tbsp fresh dill, chopped (optional): The dill is what nudges this toward its Eastern European roots and it is worth seeking out.
- 1/2 tsp salt and 1/4 tsp black pepper: Seasoning the herb butter properly means you will not need to over salt later.
- 1 tsp lemon juice: Just a squeeze brightens the entire butter mixture and cuts through the richness.
- 1 cup whole milk: Whole milk gives the sauce body that skim milk simply cannot match.
- 1 cup low sodium chicken broth: Low sodium lets you control the salt level as the sauce reduces.
- 2 tbsp all purpose flour: This tiny amount thickens the sauce just enough to cling to the chicken without turning gluey.
- 1 tbsp olive oil: Any neutral cooking oil works but olive oil adds a subtle fruitiness.
- 1 cup panko breadcrumbs: Panko stays lighter and crispier than regular breadcrumbs, which is exactly what you want on top.
- 1/4 cup grated Parmesan cheese: The Parmesan toasts into the crumbs and creates an almost cheesy crust that holds together beautifully.
- 2 tbsp unsalted butter, melted: Binding the topping together so every bite has that buttery crunch.
- 2 tbsp fresh parsley, chopped for garnish: A final shower of green makes it look as good as it tastes.
Instructions
- Get the oven ready:
- Preheat your oven to 375 degrees and grease a 9 by 13 baking dish with butter or a quick spray so nothing sticks.
- Build the herb butter:
- Mash together the softened butter, minced garlic, parsley, dill if you are using it, salt, pepper, and lemon juice in a small bowl until it looks like a fragrant green flecked paste.
- Sear the chicken:
- Heat olive oil in a large skillet over medium high heat, add the chicken pieces with a light shower of salt and pepper, and cook until they are just golden on the outside and no longer pink inside, about five to seven minutes, then transfer them to your prepared dish.
- Make the sauce:
- In that same skillet with all those lovely chicken bits stuck to the bottom, sprinkle in the flour and stir it around for a minute, then slowly pour in the milk and broth while whisking so no lumps form, letting it bubble and thicken for three to four minutes.
- Enrich everything:
- Pull the skillet off the heat and drop in that beautiful herb butter, whisking until the sauce turns silky and smells absolutely incredible, then pour it all over the chicken in the dish.
- Build the crust:
- Toss the panko, Parmesan, and melted butter together in a bowl until the crumbs are evenly coated, then scatter them across the top of the casserole in an even layer.
- Bake until golden:
- Slide the dish into the oven uncovered and bake for twenty five minutes until the topping is deeply golden and the edges are bubbling up through the crumbs.
- Rest and garnish:
- Let it sit for five minutes after it comes out so the sauce settles, then scatter fresh parsley over the top and serve it while it is still bubbling.
 Save
Save The night my daughter came home from college for the first time, she walked in the door, dropped her bags, and said she had been dreaming about this casserole for three weeks. We ate it straight from the dish with big spoons.
What to Serve Alongside
A simple green salad with a sharp vinaigrette cuts through the richness of all that butter and cheese perfectly. Steamed green beans or roasted asparagus also work wonders if you want to keep things easy and seasonal.
Swaps and Substitutions
Chicken thighs work beautifully in place of breasts if you prefer darker meat and they actually stay even juicier. For extra indulgence, tuck a layer of shredded mozzarella or Gruyere under the breadcrumb topping and watch it melt into something extraordinary.
Storage and Reheating
Cover the dish tightly and it will keep in the fridge for up to three days without losing any of its appeal. The topping softens overnight but a quick blast under the broiler brings back all the crunch in minutes.
- Scoop portions into airtight containers for the easiest work lunches you will have all week.
- The casserole can be assembled a day ahead and baked fresh when you are ready.
- Always check product labels for allergen information if you are cooking for someone with dietary restrictions.
 Save
Save Some recipes are just dinner, but this one is the kind of meal that gathers people around the table and keeps them there long after the plates are empty. That is really all you can ask for from a casserole.
Recipe Q&A
- → Can I use chicken thighs instead of breasts?
-
Yes, boneless skinless chicken thighs work beautifully in this casserole. They remain juicier and more forgiving if slightly overcooked. Adjust the sauté time by 2–3 minutes as thighs may take a little longer to cook through.
- → What should I serve with Chicken Kiev Casserole?
-
Steamed vegetables like green beans or broccoli pair well, as does a simple green salad with a light vinaigrette. Mashed potatoes or buttered egg noodles also make excellent sides to soak up the garlicky sauce.
- → Can I assemble this casserole ahead of time?
-
Absolutely. You can prepare the dish up to the baking step, cover it tightly, and refrigerate for up to 24 hours. Add the breadcrumb topping just before baking. You may need to add 5–10 extra minutes in the oven if baking straight from the refrigerator.
- → How do I store and reheat leftovers?
-
Store leftovers in an airtight container in the refrigerator for up to 3 days. Reheat individual portions in the microwave, or warm the whole dish in a 350°F oven for about 15 minutes until heated through and the topping re-crisps.
- → Can I freeze Chicken Kiev Casserole?
-
Yes, you can freeze it before or after baking. Wrap tightly and freeze for up to 2 months. Thaw overnight in the refrigerator before baking or reheating. Note that the breadcrumb topping may lose some crispness after freezing.
- → What can I substitute for panko breadcrumbs?
-
Regular breadcrumbs work fine, though they produce a slightly denser crust. For a gluten-free alternative, crushed rice cereal or almond flour mixed with a little grated Parmesan can replicate the crispy texture.
