 Save
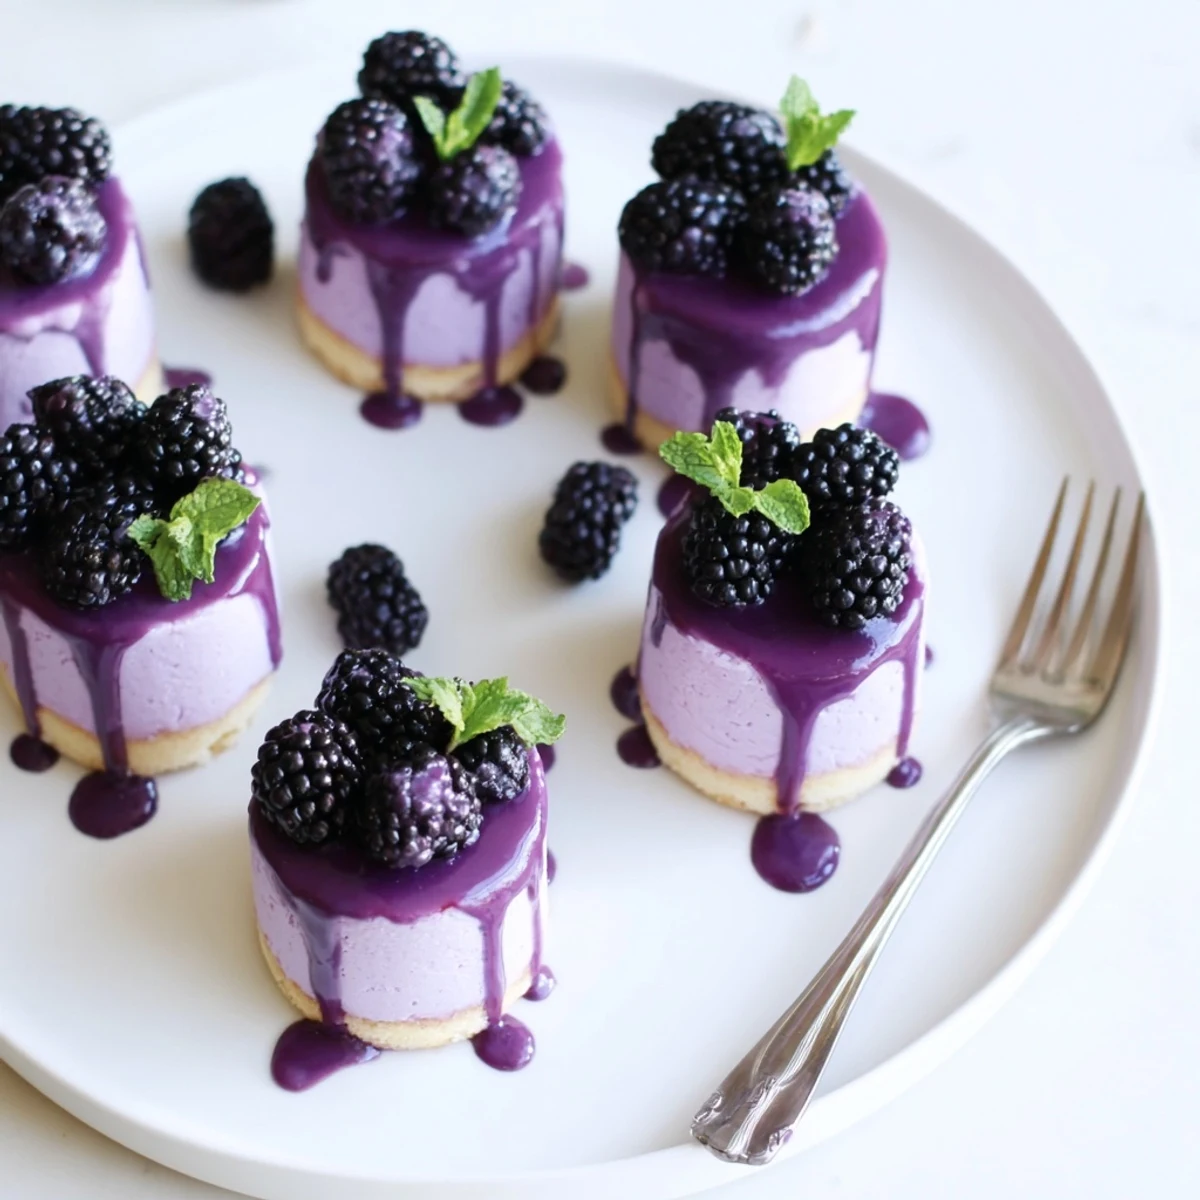
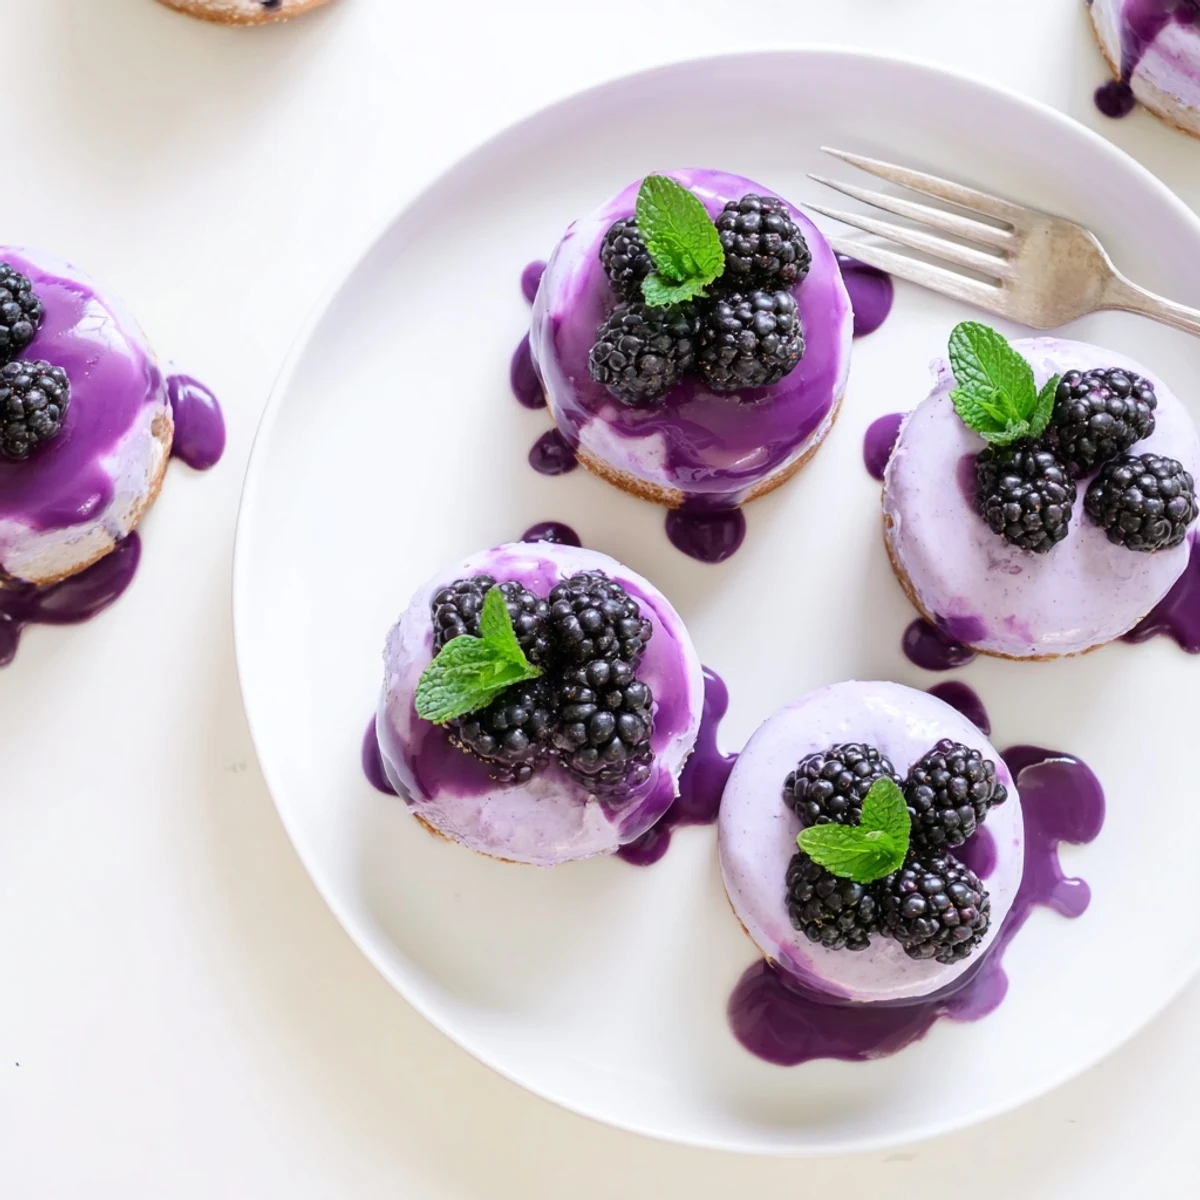
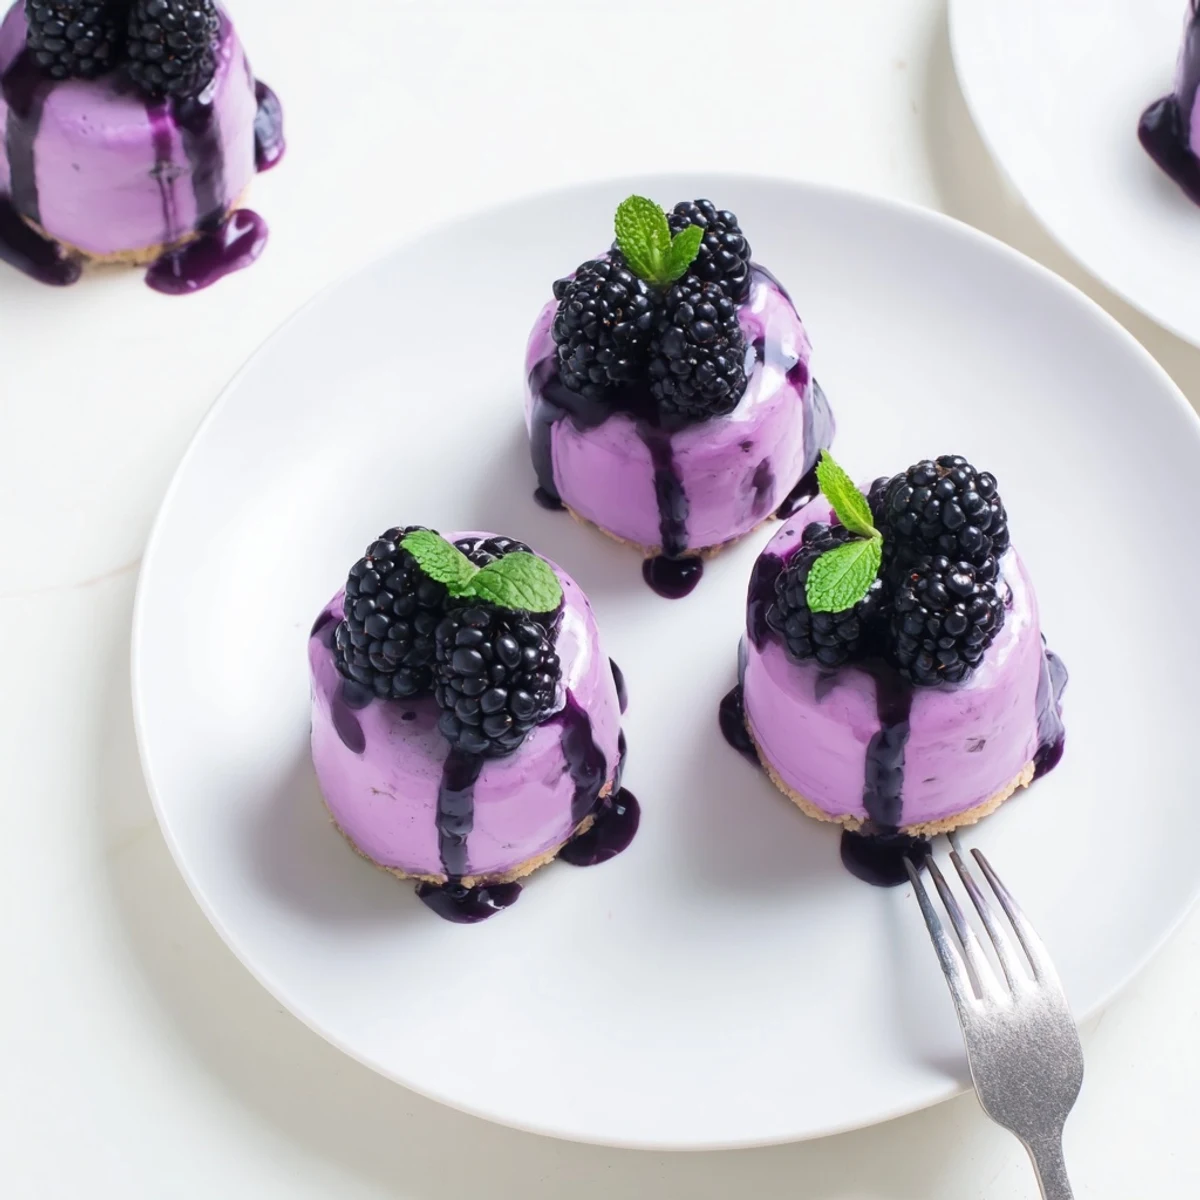
Save Create stunning individual desserts with layers of tender vanilla sponge, airy blackberry mousse, and mirror-like glaze. These sophisticated mini cakes showcase fresh blackberries in three luxurious forms—whipped into cloud-like mousse, reduced into silky puree, and finished with shimmering glazed topping. The assembly requires patience for chilling stages but rewards with restaurant-worthy presentation. Each bite delivers creamy velvet texture balanced by bright berry acidity and buttery sponge foundation. Ideal for dinner parties, bridal showers, or special occasions when you want impressive desserts that can be prepared ahead.
The first time I attempted these delicate mousse cakes, I was hosting a summer dinner party and wanted something impressive yet refreshingly light. I remember hovering over the oven, watching the sponge layer rise through the glass door, my kitchen filling with that comforting vanilla warmth. When I finally unmolded them after hours of impatient waiting, the glossy blackberry glaze caught the afternoon sun streaming through my window, and I knew these little beauties were worth every minute of the careful preparation.
I served these at my mothers birthday last August, and the silence that fell over the table as everyone took their first bite was the best compliment I could have asked for. My brother actually asked if Id secretly hired a pastry chef, which made me laugh out loud. Now whenever blackberries come into season, my kids immediately start asking when Im making those fancy purple cakes again.
Ingredients
- 2 large eggs: Room temperature eggs whip up much better and create that coveted airy sponge texture
- 60 g granulated sugar: This precise amount sweetens without weighing down the delicate crumb
- 60 g all purpose flour: Sifted twice to ensure no lumps and maximum tenderness
- 1/4 tsp vanilla extract: Pure vanilla makes all the difference in such a simple base
- Pinch of salt: Just enough to brighten the flavors and balance the sweetness
- 300 g fresh or frozen blackberries: Fresh berries yield the brightest flavor, but frozen work beautifully when out of season
- 80 g granulated sugar: Adjust slightly depending on how tart your berries are
- 2 tbsp lemon juice: This acid accentuates the blackberry natural brightness
- 6 g gelatin sheets: Leaf gelatin dissolves more cleanly than powdered, though either works perfectly
- 250 ml cold heavy cream: The cream must be very cold to achieve those silky soft peaks
- 100 g blackberry puree: Strained twice for an ultra smooth glaze that mirrors the mousse flavor
- 30 g granulated sugar: Just enough sweetening for the glossy topping
- 2 g gelatin sheet: This small amount sets the glaze beautifully while keeping it pourable
- Fresh blackberries: For that final flourish that makes these look professionally plated
- Edible flowers: Tiny violas or pansies add an elegant touch that makes these showstoppers
Instructions
- Prepare the Foundation:
- Preheat your oven to 350°F and line a 9x13 baking sheet with parchment, smoothing out any wrinkles. Beat the eggs and sugar until they turn pale and doubled in volume, about five glorious minutes of whipping. Gently fold in the flour, vanilla, and salt with a spatula, using light sweeping motions to maintain all that precious air you just whipped in.
- Bake and Cut:
- Spread the batter evenly and bake for 10 to 12 minutes until lightly golden and springy to the touch. Let it cool completely before cutting out eight circles with a 2.5 inch cutter. Place each circle at the bottom of silicone molds, pressing gently to ensure good contact.
- Create the Blackberry Base:
- Soften your gelatin sheets in cold water while you simmer the blackberries, sugar, and lemon juice until the berries are completely soft. Puree the mixture and strain it through a fine mesh sieve, pressing firmly to extract all that gorgeous purple juice. Stir in the softened gelatin until dissolved, then let it cool to room temperature.
- Whip the Magic:
- Whip your cold heavy cream to soft peaks that barely hold their shape. Gently fold the cooled blackberry mixture into the cream in three additions, using your lightest hand to keep that airy texture. The mousse should be smooth and uniform with a gorgeous deep purple color.
- Assemble and Chill:
- Spoon or pipe the mousse over each sponge base in the molds, smoothing the tops with an offset spatula. Give them a gentle tap on the counter to release any air bubbles. Refrigerate for at least four hours or until completely set, though overnight is even better for the flavors to meld.
- Prepare the Glossy Crown:
- Bloom your remaining gelatin while you warm the blackberry puree and sugar just until the sugar dissolves. Stir in the gelatin until completely melted, then let it cool until it thickens slightly but still pours easily. Test it by dripping a bit on a cold spoon to check the consistency.
- Glaze and Garnish:
- Unmold the chilled cakes onto a wire rack set over a tray to catch the drips. Pour the glaze over each cake, starting from the center and letting it cascade down the sides for that professional finish. Chill briefly to set, then top with fresh berries and delicate edible flowers.
 Save
Save These little cakes have become my go to dinner party finale because they look so incredibly impressive yet require minimal last minute work. I love how the deep purple color looks against white plates, like edible jewels on the table. There is something so satisfying about serving a dessert that makes guests gasp before they even take a bite.
Mastering the Sponge Base
The sponge layer is the foundation that holds everything together, so getting it right makes all the difference. I learned the hard way that over folding the flour creates a dense, tough cake that weighs down the delicate mousse. The batter should feel light and almost billowy when you spread it into the pan.
Working with Gelatin
Gelatin can seem intimidating, but once you understand how it behaves, it becomes your best friend for elegant desserts. I always keep extra sheets on hand because humidity and slight variations in fruit can sometimes affect the setting time. The key is patience during the blooming stage and gentle heat when dissolving.
Presentation Secrets
The glaze is what transforms these from delicious homemade treats into bakery worthy showstoppers. I learned to warm my glaze to exactly body temperature for that perfect pour that creates a mirror smooth surface.
- Work quickly once you start glazing as the mousse will begin to soften at room temperature
- Chill your serving plates briefly to help the cakes maintain their shape during plating
- Use tweezers to place delicate edible flowers for precise, professional placement
 Save
Save These little mousse cakes have a way of making any occasion feel special and elegant, even a simple Tuesday night dessert at home.
Recipe Q&A
- → Can I make these ahead of time?
-
These mini cakes actually improve when made ahead. The mousse and glaze both need proper chilling time to set—plan for at least 4 hours refrigeration, though overnight is even better for firm texture and clean slicing. Store them in airtight containers for up to 3 days.
- → What other berries work in this recipe?
-
Raspberries, blueberries, or mixed berries all substitute beautifully. Adjust sugar slightly based on natural sweetness—strawberries may need extra sugar while blackberries typically require more to balance their natural tartness.
- → Can I make these gluten-free?
-
Absolutely. Replace the all-purpose flour with a 1:1 gluten-free baking blend. The sponge texture remains tender, and the structure works perfectly for supporting the mousse layer without any compromise on the final presentation.
- → Why did my mousse not set properly?
-
This usually happens when the blackberry puree is too hot when folded into whipped cream, causing the cream to deflate. Let the puree cool completely to room temperature before combining, and ensure your heavy cream is very cold for maximum volume when whipping.
- → What can I use instead of gelatin?
-
For vegetarian versions, use agar-agar powder (about 1 teaspoon per sheet of gelatin) or vegetarian gelatin alternatives. Note that setting times may vary slightly—agar typically sets faster and firmer than traditional gelatin.
- → How do I get the mirror glaze effect?
-
The key is temperature—pour when the glaze is slightly thickened but still fluid, around 85-90°F. If too warm, it runs off too thinly. If too cool, it becomes uneven. Work quickly and pour in one smooth motion over the chilled centers.
