 Save
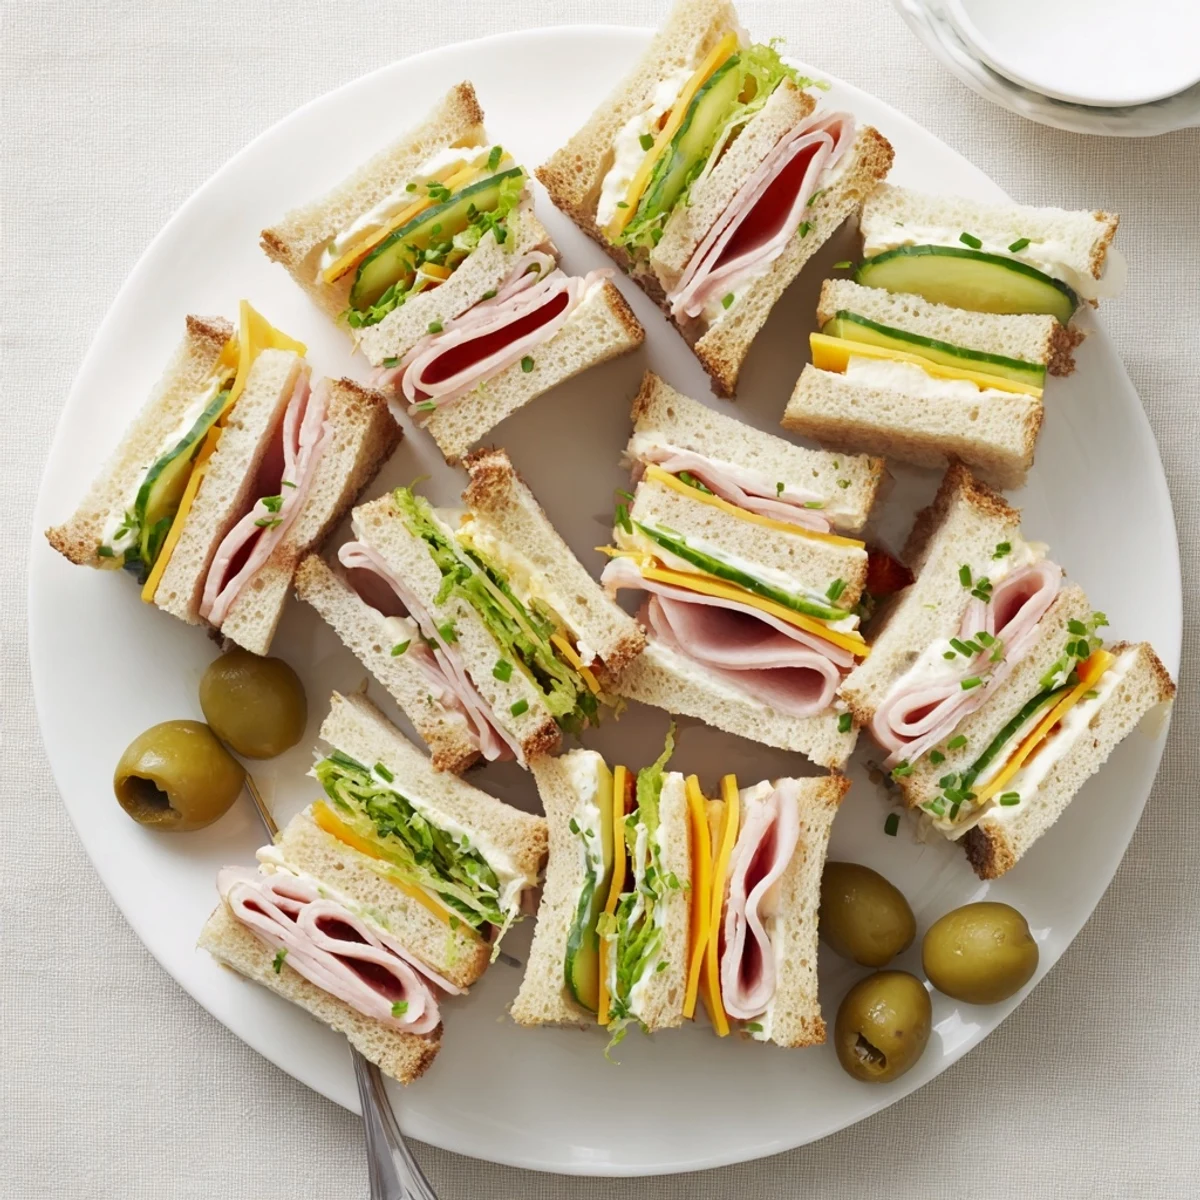
Save These mini sandwiches are quick to assemble: spread mayonnaise or softened cream cheese on sandwich bread, then layer cheddar or thinly sliced ham or turkey, or arrange cucumber, tomato and lettuce for a lighter option. Trim crusts and cut each sandwich into quarters to yield about 16 bite-sized pieces. No cooking required; chill briefly for firmer spreads and garnish with chopped herbs, pickles or olives before serving on a platter.
The quiet hum of the kitchen changes when I start assembling these mini sandwiches: the soft squeeze of bread, the crunch of fresh lettuce, the gentle clink of the spreading knife in the bowl of cream cheese. There's something undeniably playful about crafting little bites like these, making it hard not to sneak a few as I go. Sometimes I find myself lost in layering different flavors, eager to see which new combination will make someone pause mid-bite with a delighted grin. Their compact charm always draws a crowd, whether at a casual picnic or a sudden afternoon craving for something fun and satisfying.
I once made a sprawling platter of these for a last-minute game night, slicing and stacking with laughter bouncing off the kitchen tiles while friends hovered nearby for the first taste. There was an unspoken competition for the best filling—soft cream cheese with sharp chives, cool cucumber with salty cheese, or tangy tomato and crunchy lettuce. People kept switching favorites as the plate made its rounds. By the end, all that was left was a trail of crumbs and a heap of happy opinions.
Ingredients
- Bread: Choose soft sandwich bread—white, wheat, or rye for a flavorful base; trim crusts for tidier bites if you like.
- Mayonnaise: Gives a creamy, tangy spread; spreading to the edges keeps sandwiches from drying out.
- Cream cheese: Softened cream cheese adds a rich, plush layer; let it sit at room temperature to spread smoothly.
- Cheddar cheese: Sliced for melting sharpness; try grating if you want extra melt.
- Ham or turkey (optional): Adds heartiness for non-vegetarian versions; layer thinly so fillings don’t overwhelm the bread.
- Cucumber: Thin slices bring a juicy crunch; pat dry to avoid sogginess.
- Tomato: Fresh, thin slices lend brightness; season lightly with salt to draw out the flavor.
- Lettuce: Washed and dried well for crispness; stack a whole leaf for maximum crunch.
- Salt and pepper: Just a touch over vegetables totally wakes up their taste.
- Fresh herbs, pickles, olives (optional): Chopped and artfully placed, they add color and a final savory note.
Instructions
- Prep the canvas:
- Arrange your bread slices on the board and press them gently to flatten if you like dainty sandwiches.
- Spread the love:
- Slather mayonnaise or cream cheese evenly on each slice, letting the softness catch in every corner.
- Layer the flavors:
- Add cheese, meats, or snuggle cucumber, tomato, and lettuce on top, dusting veggies with a pinch of salt and pepper.
- Seal the deal:
- Top each with a second slice, then press delicately so the fillings and bread become one.
- Tidy things up:
- Trim crusts off for a neat look, or leave them for extra earthy scrumptiousness.
- Slice and style:
- Cut each sandwich into four mini triangles or squares—the satisfying snap of the knife is pure joy.
- Dress the platter:
- Arrange your beauties on a plate, sprinkle with herbs, and dot with olives or pickles; cover with a damp towel if you need them to wait their debut.
 Save
Save There was a moment last spring when these little sandwiches stole the scene at a family picnic—my niece declared they were "pocket-sized picnics," and watching the adults agree with sticky-fingered smiles made it feel like more than a meal. That afternoon, even the pickiest eaters circled back for seconds, proving small things pack great joy.
Switching Up the Fillings
One of the best discoveries with this recipe has been how forgiving it is to substitutions. Sometimes leftover roasted veggies or even a thin layer of egg salad can turn these modest sandwiches into something unexpectedly sophisticated. Don’t be shy about sneaking in dill pickles or roasted peppers for an extra zing. The real fun comes from everyone building their own versions right at the table.
Plating Like a Pro
Layering the sandwich quarters in overlapping circles or neat rows on a big platter always feels special. A sprinkle of chopped herbs or lining the platter with crisp lettuce leaves makes the colors pop and elevates the whole spread. Cheery toothpicks add both flavor and flair—pickled onions or a half olive on top are always a hit.
Making Ahead and Storing
Mini sandwiches hold up surprisingly well if you prep them with care: a buffer layer of cheese or lettuce keeps everything fresh. If you know they’ll sit, stacking them in a sealed container with a barely damp paper towel does wonders to keep them soft and perky. I always resist the urge to salt the tomatoes too early, since that’s a surefire route to sogginess!
- Use bread that’s a bit stale for easier spreading and slicing.
- Slice cucumbers extra thin so the sandwiches don’t fall apart later.
- Don’t forget about creative dipping sauces—honey mustard or herby yogurt go a long way.
 Save
Save Sharing these mini sandwiches is a sure way to invite a little playful chaos and a lot of smiles—one plate and suddenly everyone’s gathered around. I hope your next batch brings as much good-natured snack-time chatter as it does satisfied appetites.
Recipe Q&A
- → How do I prevent soggy bread?
-
Use thin layers of spreads, pat wet vegetables like tomato and cucumber dry, and assemble as close to serving time as possible. A leaf of lettuce or a thin slice of cheese can act as a moisture barrier.
- → What vegetarian filling ideas work well?
-
Try cream cheese mixed with herbs, hummus with roasted peppers, egg salad, avocado and tomato, or layers of roasted vegetables and mixed greens for flavor and texture variety.
- → Which breads give the best results?
-
Classic sandwich loaf (white or whole wheat) yields soft bite-sized pieces; mix in rye, pumpernickel, or multigrain for color and depth. Thin slices with tender crumb are easiest to trim and cut.
- → Can I make them ahead of time?
-
Assemble up to a few hours ahead and cover with a damp paper towel and plastic wrap in the fridge to keep bread soft. For longer storage, keep fillings separate and assemble just before serving to maintain freshness.
- → How should I store leftovers?
-
Store in an airtight container in the refrigerator for up to 24 hours. Expect some softening; avoid freezing as fresh bread and crisp veggies don’t freeze well.
- → What allergens should I note when serving?
-
These sandwiches commonly contain gluten, dairy, and eggs (mayonnaise or egg salad). Include a note for guests and offer alternatives like dairy-free spreads or gluten-free bread when needed.
