 Save
Save Create impressive French pastries at home with this comprehensive guide to gluten-free croissants. The process involves laminating dough with cold butter through strategic folding and chilling, developing those signature flaky layers that make croissants irresistible. While the technique requires patience and multiple chilling periods, the results deliver genuinely light, buttery pastries that rival traditional versions.
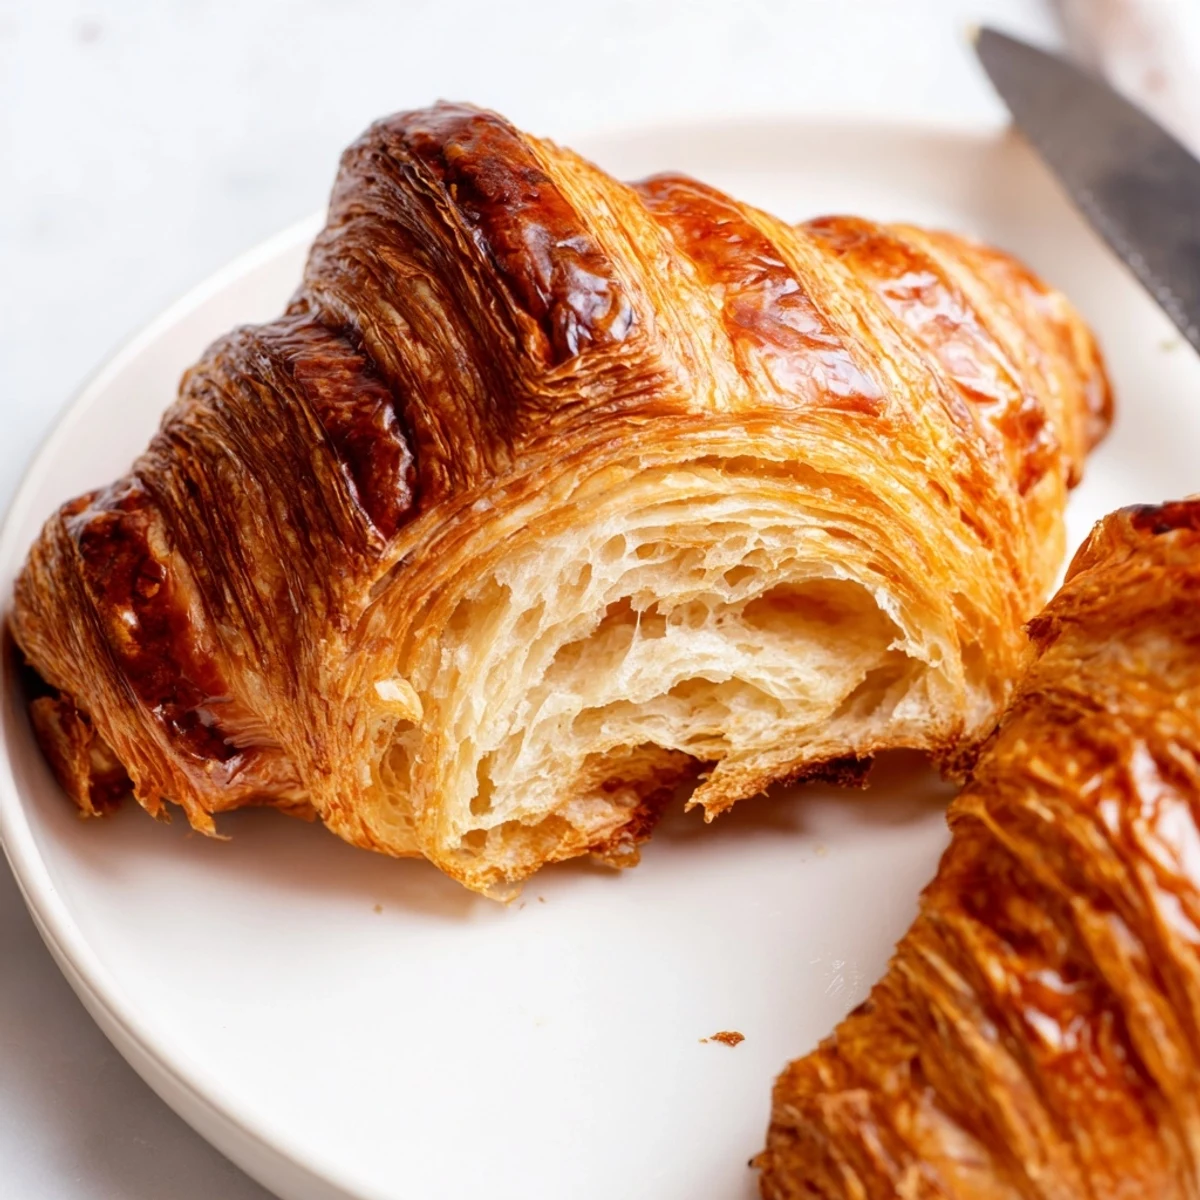
The key lies in using quality gluten-free flour blends with xanthan gum for structure, maintaining proper dough temperature during lamination, and allowing adequate proofing time. These croissants emerge golden from the oven with a tender crumb and satisfying crunch—perfect for breakfast with jam or as an indulgent afternoon snack.
The kitchen counter was covered in a fine dust of gluten-free flour, my hands sticky with butter, and I honestly thought about giving up and buying bakery croissants instead. But then I remembered my grandmother standing over her pastry board, whispering that anything worth eating is worth waiting for, and suddenly the three-fold process didn't feel so impossible anymore. That first batch emerged golden and impossibly flaky, proving that gluten-free doesn't mean flavor-free or texture-free. Now I keep a batch in the freezer always, ready for those moments when only a warm, freshly baked croissant will do.
My sister visited last spring, skeptical that anything gluten-free could rival the croissants she'd enjoyed in Paris. I watched her face change from polite interest to genuine delight when she bit into one warm from the oven, butter dripping down her chin. She actually asked if I was sure they were gluten-free, then proceeded to eat three while standing at the counter. That's become our Sunday morning tradition now—coffee, still-warm croissants, and the satisfaction of creating something extraordinary from simple ingredients.
Ingredients
- Gluten-Free Flour Blend: Choose a blend with xanthan gum already included, as this helps mimic the elasticity that gluten normally provides in traditional pastry
- Instant Yeast: This variety dissolves beautifully without needing proofing first, saving you a step and ensuring reliable rise
- Unsalted Butter: Youll need both softened and cold butter—each plays a different role in creating those signature flaky layers
- Warm Milk: The warmth activates the yeast while the liquid binds the dough, so aim for bath temperature, around 100°F
- Eggs: Room temperature eggs incorporate more evenly into the dough, while the extra yolk creates that gorgeous golden sheen
Instructions
- Mix the dough:
- Combine your dry ingredients in a large bowl, whisk warm milk and egg together, then pour into the flour mixture. The dough will feel softer and stickier than wheat-based dough, which is completely normal for gluten-free baking. Beat in the softened butter until everything comes together, then cover and refrigerate for a full hour—this rest period lets the flour hydrate properly.
- Prepare the butter block:
- Cold butter needs to become pliable but remain cold, so place it between parchment paper and pound it with your rolling pin until it flattens into a rectangle. Roll gently to about 5 by 7 inches, then return it to the fridge. This butter layer will create those gorgeous flaky layers as it melts between dough sheets during baking.
- First fold:
- Roll your chilled dough into a rectangle, place that cold butter block in the center, and fold the dough over like youre wrapping a precious gift. Roll gently into a larger rectangle, then fold into thirds—this is your first fold. Wrap it up and chill for 30 minutes. The cold keeps the butter from melting into the dough instead of creating separate layers.
- Complete the folds:
- Roll out and fold two more times, chilling for 30 minutes between each fold. By now youll notice the dough becoming smoother and more cooperative. After the final fold, wrap it and let it rest in the fridge for another hour—this patience rewards you with the most beautifully defined layers.
- Shape and proof:
- Roll the dough into a large rectangle, cut it into eight triangles, and roll each from the wide end to the point. Curve the ends slightly to create that classic crescent shape, then arrange them on a parchment-lined baking sheet. Cover loosely and let them rise in a warm spot for about two hours until they look puffy and feel slightly jiggly.
- Bake to golden perfection:
- Whisk egg yolk with milk and brush generously over each croissant, then bake at 400°F for 18 to 20 minutes. Your kitchen will fill with that unmistakable buttery aroma that makes neighbors pause on the sidewalk. They should be deeply golden and feel light when lifted. Cool briefly on a rack, but serve them while still warm for the ultimate experience.
 Save
Save Last Christmas morning, I woke up early to shape these croissants while the house was still quiet. By the time everyone wandered into the kitchen, drawn by the incredible smell, trays of golden pastries were cooling on the counter. My dad, a former skeptic of gluten-free baking, took one bite and declared these better than any bakery croissant hed ever had. That's the magic of this recipe—it turns gluten-free from limitation into something worth celebrating.
Working with Gluten-Free Pastry
Gluten-free dough behaves differently than traditional pastry, often feeling more fragile and requiring gentler handling. Don't be alarmed if the dough seems softer or tears slightly during rolling—simply patch it with your fingers and keep going. The key is maintaining that crucial temperature balance between the dough and butter layer throughout the entire lamination process.
Timing Your Baking
The total time commitment may seem intimidating, but most of it is hands-off resting in the refrigerator. I often start the process the evening before, completing the folds and leaving the dough wrapped in the fridge overnight. In the morning, I simply roll, shape, proof, and bake—fresh croissants for breakfast without the morning rush.
Serving and Storage
These croissants achieve peak deliciousness within two hours of baking, with the exterior still crisp and the interior tender and warm. They freeze beautifully after baking—cool them completely, wrap individually, and freeze for up to a month. Reheat in a 350°F oven for about 8 minutes and they will taste freshly baked.
- Split and fill with ham and gruyère cheese for a decadent lunch sandwich
- Use day-old croissants to make incredible bread pudding or pain perdu
- Store any leftovers in a paper bag to maintain the crisp exterior texture
 Save
Save There is something profoundly satisfying about pulling a tray of perfectly golden croissants from your own oven, especially when you never thought you'd enjoy them again after going gluten-free. May your kitchen be filled with flour, butter, and the joy of baking something extraordinary.
Recipe Q&A
- → What makes gluten-free croissants different from traditional ones?
-
Gluten-free croissants use specially formulated flour blends containing xanthan gum to replicate the elasticity and structure that gluten typically provides. The technique remains similar—butter lamination creates flaky layers—but the dough requires more careful handling due to its delicate nature. With proper execution, the results achieve remarkably similar texture and taste to wheat-based versions.
- → Can I make these dairy-free as well?
-
Absolutely. Substitute the butter with high-quality plant-based butter sticks and use your preferred non-dairy milk. The lamination process works equally well with dairy-free alternatives, though some brands may produce slightly different color or flavor profiles. Look for butter substitutes with high fat content for optimal flakiness.
- → Why does the dough need so much chilling time?
-
Chilling is crucial for several reasons. First, it keeps the butter firm and separate from the dough layers—this creates the flaky texture during baking. Second, gluten-free flours benefit from resting periods, allowing them to hydrate properly and develop structure. Finally, working with cold dough prevents it from becoming sticky and difficult to handle during rolling and folding.
- → How do I know when croissants are properly proofed?
-
Properly proofed croissants will appear noticeably puffy and increased in size, roughly doubling in volume. When gently touched with your finger, the dough should slowly spring back rather than feel tight or deflated. The surface should look smooth and slightly glossy. Under-proofed croissants will be dense, while over-proofed ones may collapse in the oven.
- → Can I freeze the dough or baked croissants?
-
Yes, freezing works well at different stages. You can freeze the dough after shaping but before proofing—thaw overnight in the refrigerator, then proof and bake. Alternatively, freeze fully baked croissants in airtight bags for up to a month. Reheat frozen baked croissants in a 350°F oven for 5-8 minutes to restore crispness.
- → Why did my croissants lose their shape in the oven?
-
This typically happens due to under-proofing or insufficient chilling before baking. If the dough hasn't rested enough after the final folding, the butter can melt too quickly and leak out. Ensure proper proofing until the croissants are visibly puffy, and consider chilling the shaped pastries for 15-20 minutes before baking to help them hold their form.
