 Save
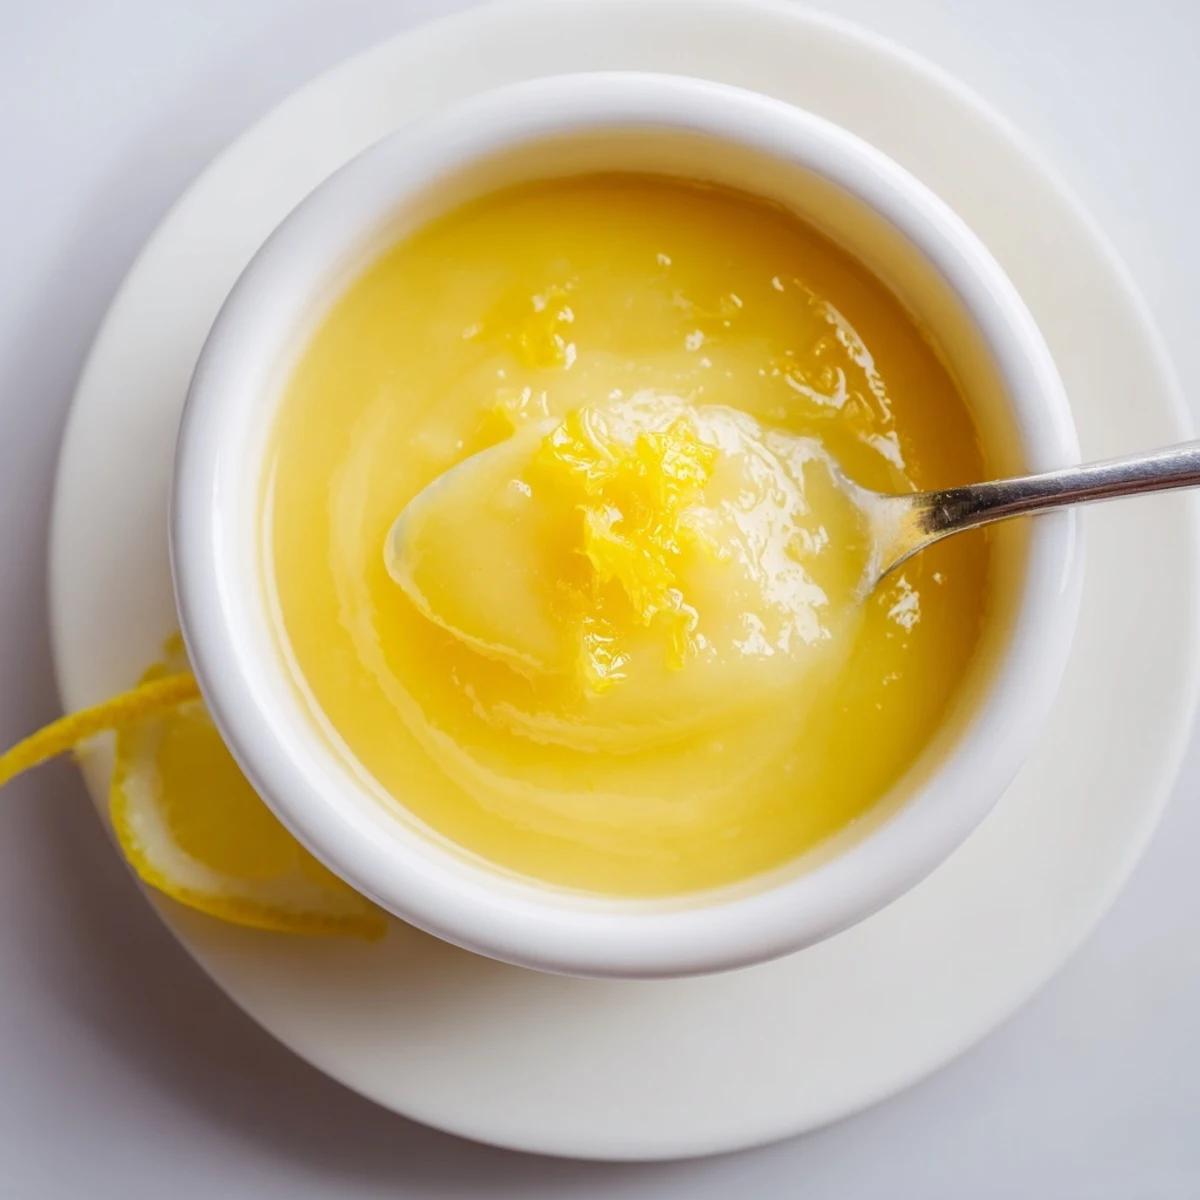
Save Silky lemon curd: whisk eggs and sugar with fresh lemon zest and juice, then cook gently over a double boiler, whisking continuously for about 8-10 minutes until it thickly coats a spoon. Off the heat, stir in cubed butter for a glossy texture, then strain for extra-smooth curd. For a dairy-free version, swap plant-based butter and strain twice for an extra-smooth finish. Makes about 2 cups (8 servings); cool, jar and refrigerate up to 2 weeks. Ideal on scones, cakes, or in yogurt.
There’s something wonderful about the way the fragrance of fresh lemons fills the kitchen when you’re making lemon curd. A sharp burst of citrus in the air, sunlight spilling across the counter, and suddenly everything feels a little brighter. I usually end up sneaking a taste straight from the spoon, even when I promise myself to wait. Making this spread always feels like inviting a bit of early summer indoors, no matter the weather.
One afternoon, I tried this recipe while my cousin was visiting and we ended up licking lemon curd off whisks, ignoring the scones we were meant to be waiting for. The sweet-tart aroma lingered long after we’d cleaned up, making the house feel extra cozy. Ever since, I whip this up whenever friends drop by on short notice, and it always disappears faster than I expect.
Ingredients
- Large eggs: Room temperature eggs whisk more smoothly into the sugar, so I set mine on the counter while prepping everything else.
- Unsalted butter, cubed: Cold butter brings richness and sheen; add it off the heat for a glossy finish.
- Lemons (zest and juice): Freshly grated zest and hand-squeezed juice make all the difference in fragrance and tang, and a microplane ensures no bitter pith gets in.
- Granulated sugar: Fine granulated sugar dissolves more quickly; don’t skimp, as it balances the tartness of the lemons perfectly.
Instructions
- Whisk the eggs and sugar:
- In a heatproof bowl, vigorously whisk together eggs and granulated sugar until the mix is pale and the sugar is mostly dissolved – your arm might get a mini workout, but it’s worth it.
- Add citrus:
- Stir in the vibrant lemon zest and freshly squeezed juice, letting the scent tell you you’re definitely on the right path.
- Set up your double boiler:
- Place your bowl over a pot with simmering water (making sure the bottom doesn’t touch), and let the gentle steam do the heavy lifting.
- Cook and thicken:
- Whisk continuously as the mixture slowly thickens; around the 8-minute mark, you’ll see it cling to the back of your spoon like a soft, lemony custard.
- Add butter:
- Remove from heat promptly and whisk in the cubed butter – it melts into the curd, turning it glossy and impossibly smooth.
- Strain and cool:
- Pour through a fine-mesh sieve into a clean bowl so your curd is velvety and free of zest or any scrambled bits, then let it cool before jarring.
 Save
Save It’s funny how a bowl of bright yellow curd can turn breakfast into something a little celebratory. Once, I brought a jar to a friend’s weekend brunch and we ended up spreading it over everything – even the pancakes that weren’t supposed to be lemony. For a moment, it felt like we’d all managed to bottle a bit of sunshine at the table.
Making the Most of Leftovers
Don’t let a spoonful go to waste – swirl leftover curd into yogurt, smoothie bowls, or even a last-minute parfait. When I feel brave, I add a dollop on my pancakes for zing. If you’ve never tried it in thumbprint cookies, the contrast with crumbly dough is pure delight.
Sterilizing and Storing
I was skeptical about sterilizing jars until one batch developed an off flavor after a week. Now, I always rinse jars with boiling water and dry thoroughly before filling – it keeps the curd tasting fresh and helps it last the full two weeks in the fridge. Labeling the jars with doodles or jokes has become my little tradition.
Troubleshooting Curd Mishaps
If your curd ever turns out lumpy, don’t panic – straining (even twice) usually saves it. Giving the mixture a slow start with gentle heat prevents curdling. Sometimes, a quick whisk with a silicone spatula will rescue a thickening batch just in time.
- Scoop often and check thickness every other minute.
- If a few eggy bits sneak in, straining is your best friend.
- Never skip the cooling step before jarring, or condensation can affect texture.
 Save
Save The real joy is in those tart, sweet spoonfuls straight from the fridge on a sleepy morning. Lemon curd has a way of bringing little sparks of brightness to ordinary days – and that’s why I keep making it.
Recipe Q&A
- → How long will lemon curd keep in the fridge?
-
Stored in sterilized jars, chilled lemon curd keeps up to 2 weeks. Discard if you notice off smells, discoloration, or mold.
- → How do I avoid curdling while cooking?
-
Cook gently over simmering water and whisk constantly. Keep the bowl off direct heat, and remove from the heat as soon as it thickly coats a spoon before adding butter.
- → Can I make this without dairy?
-
Yes. Substitute plant-based butter and follow the same method. Texture may vary slightly; straining helps achieve smoothness.
- → What indicates the curd is properly thickened?
-
When the mixture coats the back of a spoon and a clear line remains when you run your finger through it, the curd has thickened enough.
- → How can I get an extra-smooth texture?
-
Pass the finished curd through a fine-mesh sieve; for silkier results, strain twice and use room-temperature butter when whisking in.
- → Best ways to serve lemon curd?
-
Use it on scones or toast, as a tart or cake filling, or swirled into yogurt. It pairs especially well with Earl Grey or Darjeeling tea.
