 Save
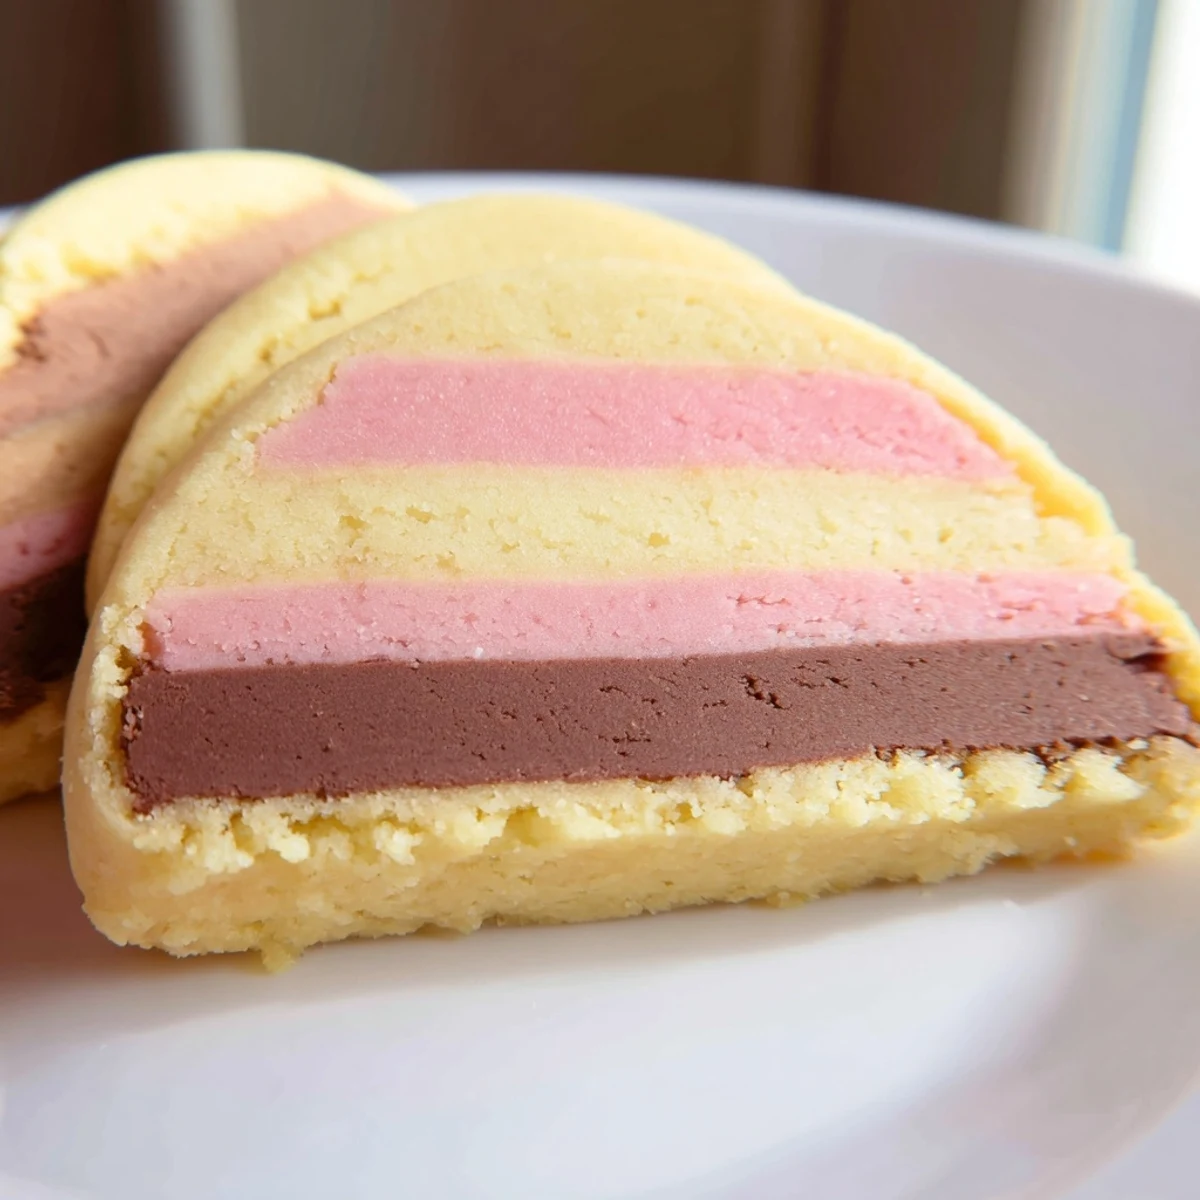
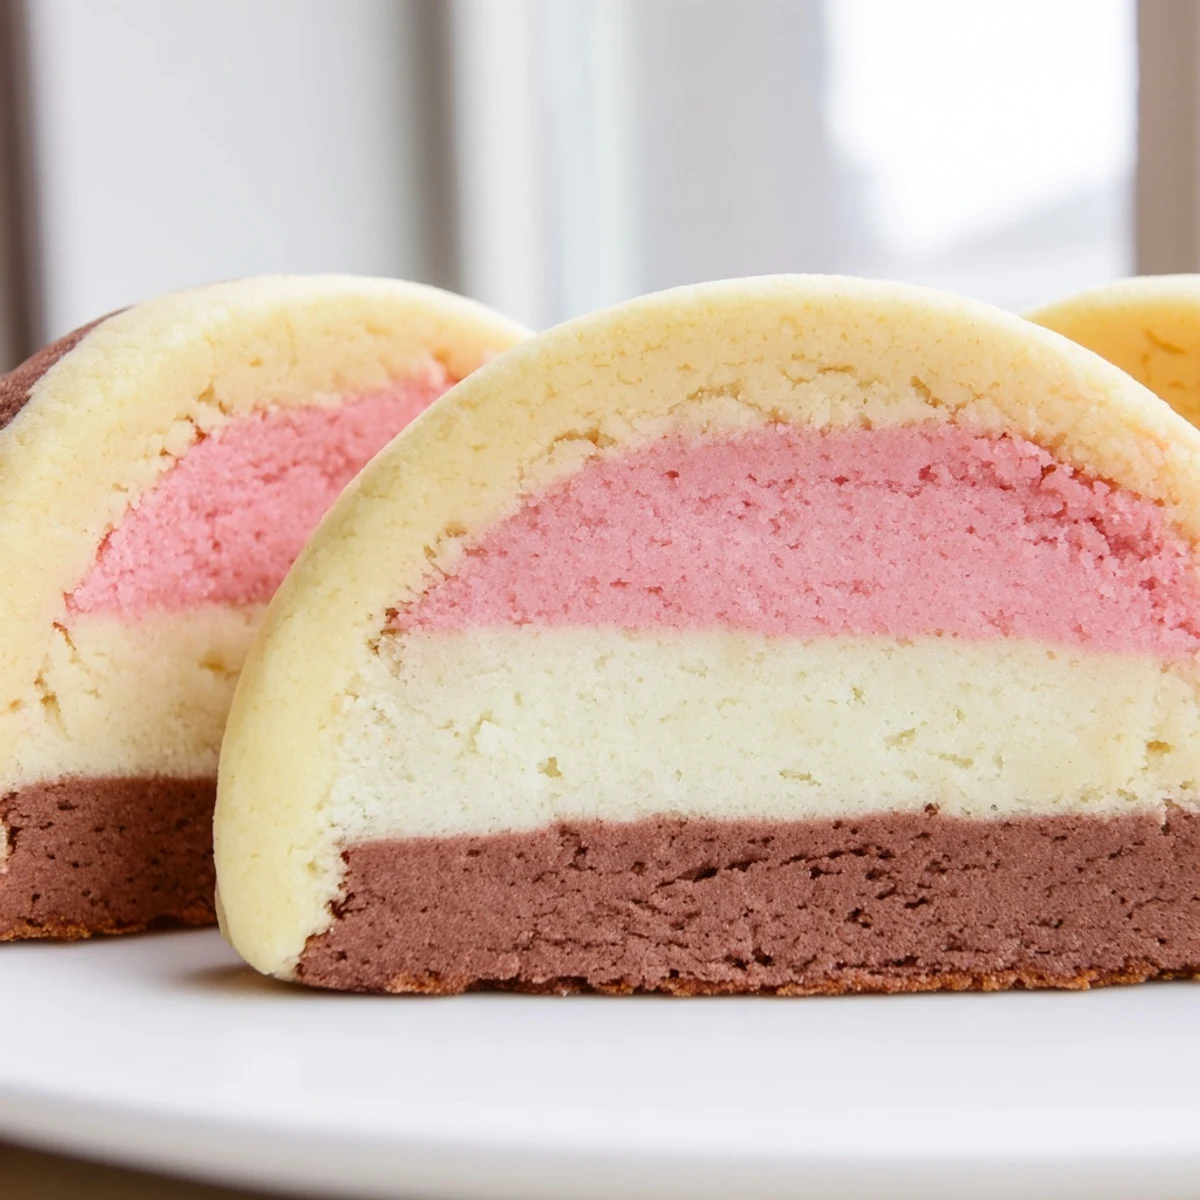
Save Neapolitan cookies bring together three classic flavors—chocolate, vanilla, and strawberry—in one beautifully layered buttery treat. Inspired by the iconic ice cream combination, each cookie showcases a distinct tri-color pattern that makes them as visually striking as they are delicious.
The dough is divided into three portions, each flavored and colored separately, then stacked and chilled before slicing. They require about 30 minutes of prep time, a brief 12-minute bake, and some patience while the dough firms up in the fridge.
Perfect for holiday platters, bake sales, or anytime you want a cookie that stands out on the dessert table.
The afternoon I stumbled on the idea of stacking three cookie doughs into one log, my kitchen looked like a pastel crime scene. Flour dusted every surface, cocoa smudged my favorite apron, and strawberry powder somehow ended up in my hair. But when I sliced into that chilled log and saw those perfect tri colored stripes, I let out a noise that embarrassed even my dog. These Neapolitan cookies are a buttery love letter to the ice cream counter, and they taste even better than they look.
I brought a tin of these to my neighbor Marge after she spent a week convincing me that cookies could never rival ice cream. She ate four standing at the door, then asked if I could teach her twelve year old granddaughter to make them. That tiny kitchen lesson turned into a full afternoon of flour fights and giggles, and now they make these together every holiday.
Ingredients
- 2 and one half cups (315 g) all purpose flour: The backbone of the dough, measured by spooning into the cup and leveling off for accuracy.
- 1 tsp baking powder: Gives just enough lift without puffing out those clean layers you worked so hard to build.
- Half tsp salt: Never skip this, as it sharpens every flavor and keeps the sweetness honest.
- 1 cup (225 g) unsalted butter, softened: Leave it out for about an hour so it creams smoothly without melting into a greasy mess.
- 1 and one quarter cups (250 g) granulated sugar: Regular white sugar works best here since brown sugar would muddy the color of the vanilla and strawberry layers.
- 2 large eggs: Added one at a time so the emulsion holds together properly.
- 2 tsp pure vanilla extract: The real stuff matters here because the vanilla layer depends on it entirely.
- 1 tbsp freeze dried strawberry powder: This is the secret weapon that gives you genuine strawberry flavor and a natural pink hue without sogginess.
- 2 tbsp unsweetened cocoa powder: Use a quality brand since this single ingredient carries the entire chocolate layer.
- 1 tsp milk: Just enough to bring the cocoa dough together without making it sticky.
Instructions
- Whisk the dry ingredients:
- In a medium bowl, whisk the flour, baking powder, and salt until evenly distributed. Set this aside so it is ready when you need it.
- Cream butter and sugar:
- Beat the softened butter and sugar together in a large bowl until the mixture turns pale and fluffy, roughly two minutes with an electric mixer.
- Add eggs and vanilla:
- Drop in one egg at a time, beating after each addition, then pour in the vanilla extract and mix until everything smells like a bakery.
- Combine wet and dry:
- Gradually add the flour mixture to the butter mixture, mixing on low speed until the dough just comes together without any dry streaks.
- Split into three portions:
- Divide the dough as evenly as you can manage, using a kitchen scale if you want precision or eyeballing it if you are feeling confident.
- Build the strawberry dough:
- Knead the freeze dried strawberry powder into one portion until the color is uniform and there are no pale streaks hiding inside.
- Build the chocolate dough:
- Work the cocoa powder and milk into a second portion until it turns a rich, deep brown and smells intensely chocolaty.
- Reserve the vanilla dough:
- Leave the final portion exactly as it is, because this pale dough is your vanilla layer and needs nothing extra.
- Shape into rectangles:
- Place each dough portion on parchment paper or plastic wrap and pat it into a flat rectangle about eight by four inches, keeping the thickness even throughout.
- Stack and press:
- Lay the chocolate rectangle down first, then vanilla, then strawberry on top, pressing gently so the layers stick together without blending into each other.
- Chill until firm:
- Wrap the whole stack tightly and refrigerate it for at least forty five minutes until you can press it with a finger and leave no dent.
- Preheat and prep:
- Set your oven to 350 degrees Fahrenheit and line your baking sheets with fresh parchment paper while the dough finishes firming up.
- Slice into cookies:
- Use a sharp knife to cut the log crosswise into quarter inch slices, arranging them one inch apart on the prepared sheets so they have room to spread slightly.
- Bake until golden:
- Slide the trays into the oven for ten to twelve minutes, watching for the faintest golden edge before pulling them out.
- Cool properly:
- Let the cookies rest on the baking sheet for five minutes, then transfer them gently to a wire rack to cool completely so the layers set firmly.
 Save
Save The moment these cookies became more than food was when my friend Laura held one up to the light and said it looked almost too beautiful to eat. She ate six anyway, but she paused to admire each one first.
Storage and Keeping Them Fresh
These cookies store beautifully in an airtight container at room temperature for up to a week, and they actually improve after the first day as the flavors settle into each other. If you want to keep them longer, freeze the sliced dough on a tray until solid, then transfer the frozen slices to a bag and bake them straight from the freezer, adding just one extra minute to the baking time.
Swaps and Flavor Adventures
Raspberry powder works just as well as strawberry if you want a slightly tarter fruit layer, and a half teaspoon of lemon zest folded into the vanilla dough makes the whole cookie taste brighter. I once added a pinch of espresso powder to the chocolate layer on a whim, and it turned a simple cookie into something people could not stop talking about.
Tools That Make This Easier
You do not need fancy equipment, but a few basics will save you frustration and improve your results noticeably. A kitchen scale makes dividing the dough into three equal portions almost effortless. A long sharp knife with a thin blade gives you cleaner slices than a serrated one, which can tear the layers. Parchment paper is essential for shaping and stacking without sticking.
- Chill your knife under cold water for a few seconds before slicing to get the cleanest cuts possible.
- If the dough cracks while slicing, let it sit at room temperature for five minutes to soften slightly.
- Always bake one test cookie first to check your oven timing before committing a whole tray.
 Save
Save Every batch you make will teach you something small, and that is the real joy of baking these colorful little squares of happiness. Share them generously because they taste even better when somebody else smiles at that first bite.
Recipe Q&A
- → Can I make Neapolitan cookie dough ahead of time?
-
Yes, the assembled dough log can be wrapped tightly and refrigerated for up to 3 days before slicing and baking. You can also freeze it for up to 2 months—thaw overnight in the fridge before using.
- → What can I use instead of freeze-dried strawberry powder?
-
If you don't have freeze-dried strawberry powder, you can use 2 drops of pink or red food coloring along with ½ teaspoon of strawberry extract. Raspberry powder or a bit of crushed freeze-dried raspberries also work well as a substitute.
- → Why is my dough spreading too much during baking?
-
Dough that spreads usually hasn't been chilled long enough. Make sure the assembled log is firm to the touch before slicing—at least 45 minutes in the fridge. If your kitchen is warm, you can also chill the sliced cookies on the baking sheet for 10 minutes before putting them in the oven.
- → How do I get clean, even slices of the layered dough?
-
Use a sharp, thin-bladed knife and wipe it clean between cuts. Chilling the dough thoroughly is key—slightly firm dough produces the neatest slices. You can also rotate the log a quarter turn after every few cuts to maintain a round shape.
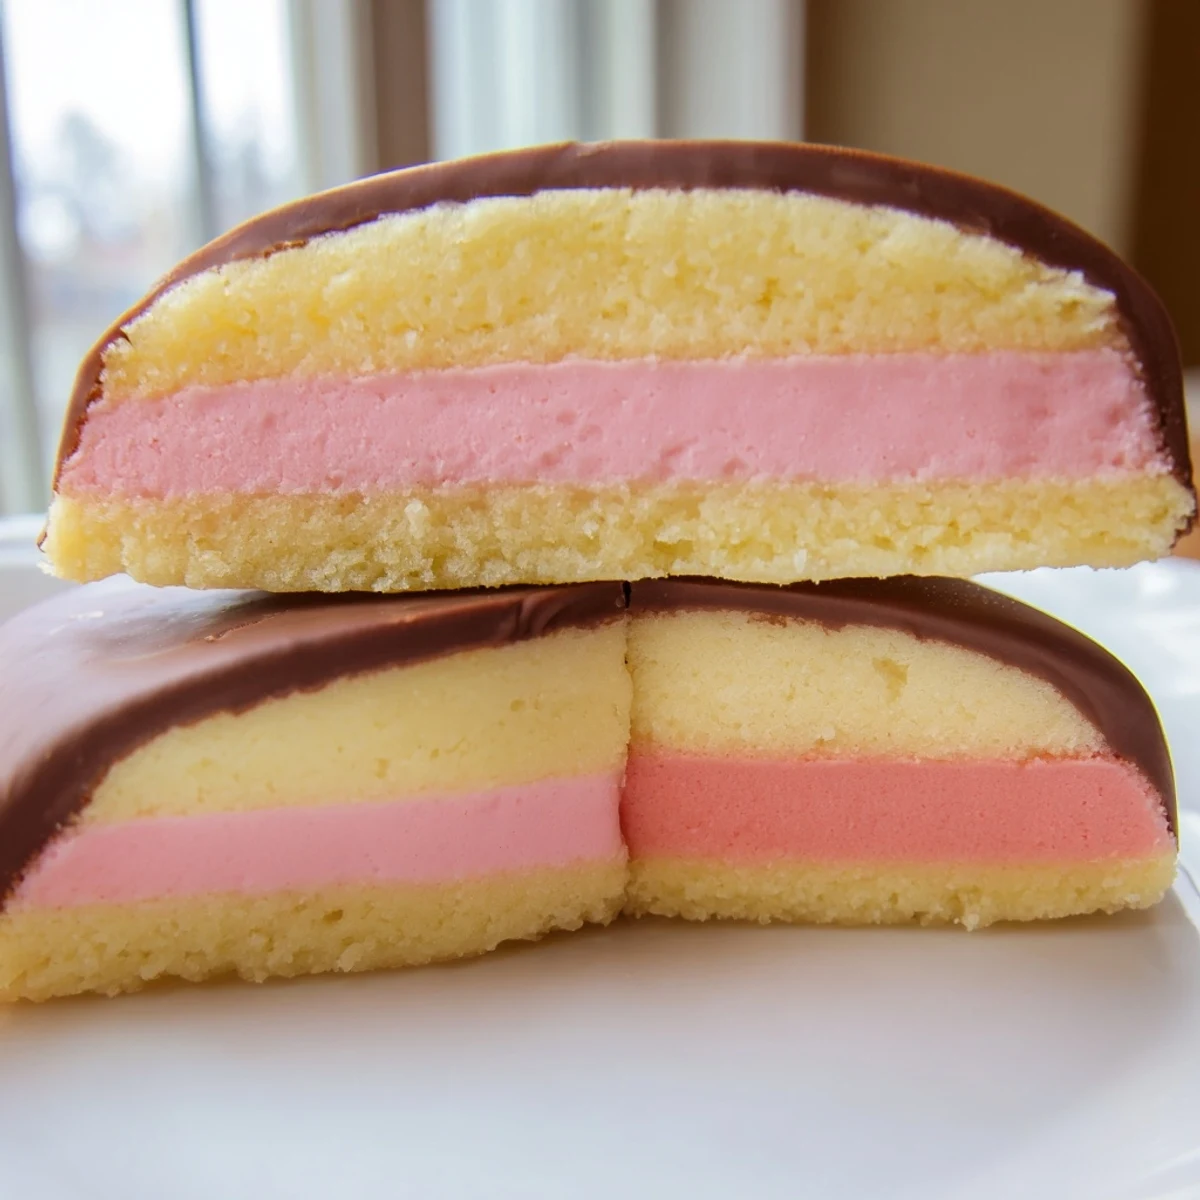
- → Can I dip these cookies in chocolate for extra flavor?
-
Absolutely. Melted semisweet or dark chocolate pairs wonderfully with the three flavors. Dip half of each cooled cookie and place on parchment paper until set. This also adds a lovely professional touch for gift-giving.
- → How should I store leftover Neapolitan cookies?
-
Store cooled cookies in an airtight container at room temperature for up to one week. Layer them between sheets of parchment paper to prevent the colored layers from sticking together. They can also be frozen for up to 3 months.
