 Save
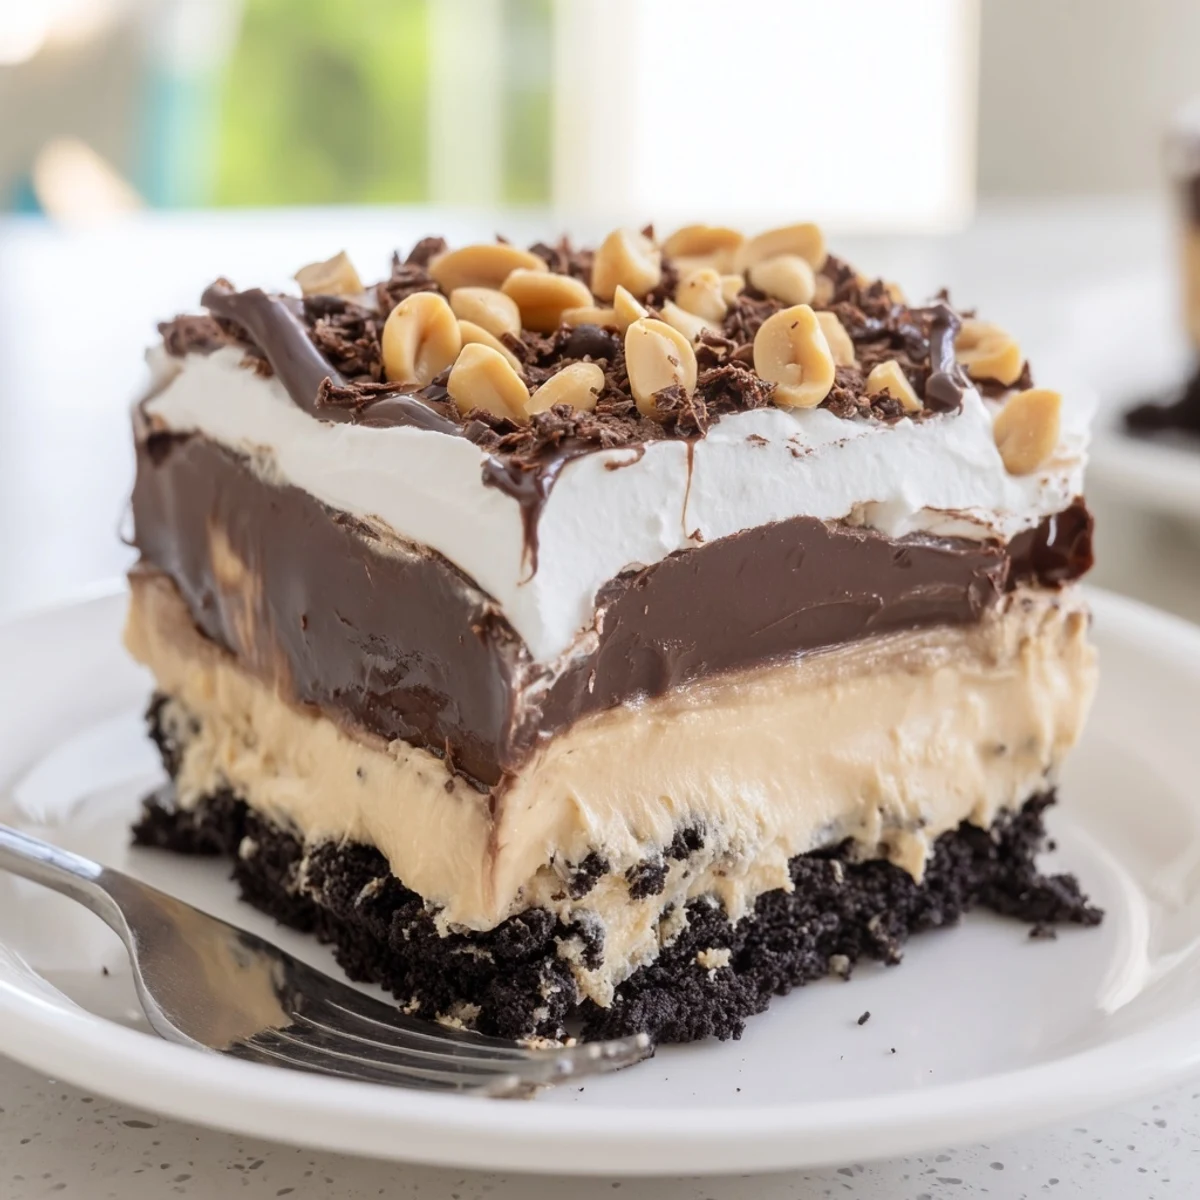
Save This no-bake peanut butter layered delight is a showstopping dessert that requires zero oven time. A buttery crushed cookie crust forms the foundation, topped with a luscious cream cheese and peanut butter mousse, followed by a glossy chocolate ganache layer.
Finished with fluffy whipped topping, chopped peanuts, and chocolate shavings, each slice delivers a perfect balance of textures and flavors. With just 25 minutes of hands-on prep and a chill time of 4 hours, this dessert is as effortless as it is impressive.
It serves 8, making it ideal for gatherings, potlucks, or satisfying that peanut butter craving any day of the week.
My sister walked into my kitchen one July evening, declared she was craving something ridiculous, and dumped a bag of Oreos and a jar of peanut butter on my counter before I could protest. Four hours later we were sitting on the floor with spoons, eating straight from the pan, completely unwilling to wait for plates. This peanut butter layered delight is the kind of dessert that turns reasonable people into grazers.
I brought this to a potluck once and watched three adults hover near the dessert table, returning for seconds and then suspiciously tiny thirds. Nobody believed me when I said there was no baking involved. My friend David asked if I could teach his wife to make it, and she was standing right there, which made everything wonderfully awkward.
Ingredients
- Chocolate sandwich cookies (200 g): Oreos are the classic choice here, and you want them crushed fine enough that they hold together when pressed but still have some texture. Leave the filling in, as it actually helps bind the base.
- Unsalted butter (60 g), melted: This is what turns crumbs into a crust. Let it cool slightly before mixing so you do not melt the cookie filling completely.
- Cream cheese (250 g), softened: Set it out an hour ahead. Cold cream cheese will leave you with lumps no amount of beating can fix, and smoothness is everything in that middle layer.
- Creamy peanut butter (180 g): Use the regular commercial kind, not the natural stir variety, because the stabilized texture spreads evenly and sets beautifully. Natural peanut butter can separate and make the layer greasy.
- Powdered sugar (100 g): Sift it if it has been sitting in your pantry for a while, since clumps will show up as white streaks in the filling.
- Whipped topping (150 ml plus 200 ml), thawed: Divided between the peanut butter layer and the final topping. A generic store brand works just as well as the name brand here.
- Semisweet chocolate chips (120 g): Do not substitute milk chocolate, as it will be too sweet against the peanut butter and sugar already in the dessert.
- Heavy cream (80 ml): This turns the chocolate chips into a glossy ganache that sets with just the right amount of fudge-like firmness.
- Chopped roasted peanuts (30 g, optional): A handful on top adds a welcome crunch and signals to anyone looking that peanut butter lives inside.
- Chocolate shavings (optional): A vegetable peeler dragged across a chocolate bar gives you elegant curls with almost zero effort.
Instructions
- Build the Cookie Crust:
- Toss the crushed cookies into a bowl, pour in the melted butter, and stir until every crumb glistens slightly. Press the mixture firmly and evenly into the bottom of your pan, using the back of a spoon or the flat bottom of a glass to really compact it. Slide it into the freezer for fifteen minutes so it firms up while you work on the next layer.
- Whip Up the Peanut Butter Filling:
- Beat the softened cream cheese, peanut butter, and powdered sugar together until the mixture is completely smooth and looks like the most edible cloud you have ever seen. Gently fold in the first portion of whipped topping with a spatula, using slow sweeping motions so you do not deflate it. Spread this filling over the chilled crust, smoothing the top as evenly as you can manage.
- Pour On the Chocolate Ganache:
- Combine the chocolate chips and heavy cream in a microwave-safe bowl and heat in twenty-second bursts, stirring after each one, until the mixture is glossy and lump-free. Let it cool for a few minutes so it thickens just slightly, then pour it over the peanut butter layer and tilt the pan gently to coax it into an even coat.
- Chill Patiently:
- Cover the pan loosely and tuck it into the refrigerator for at least four hours. Overnight is even better because the layers settle into each other and the texture becomes silky throughout.
- Finish with Flair:
- Spread the remaining whipped topping over the chocolate layer, then scatter chopped peanuts and chocolate shavings across the surface. Slice with a sharp knife dipped in hot water for clean edges, and serve while still well chilled.
 Save
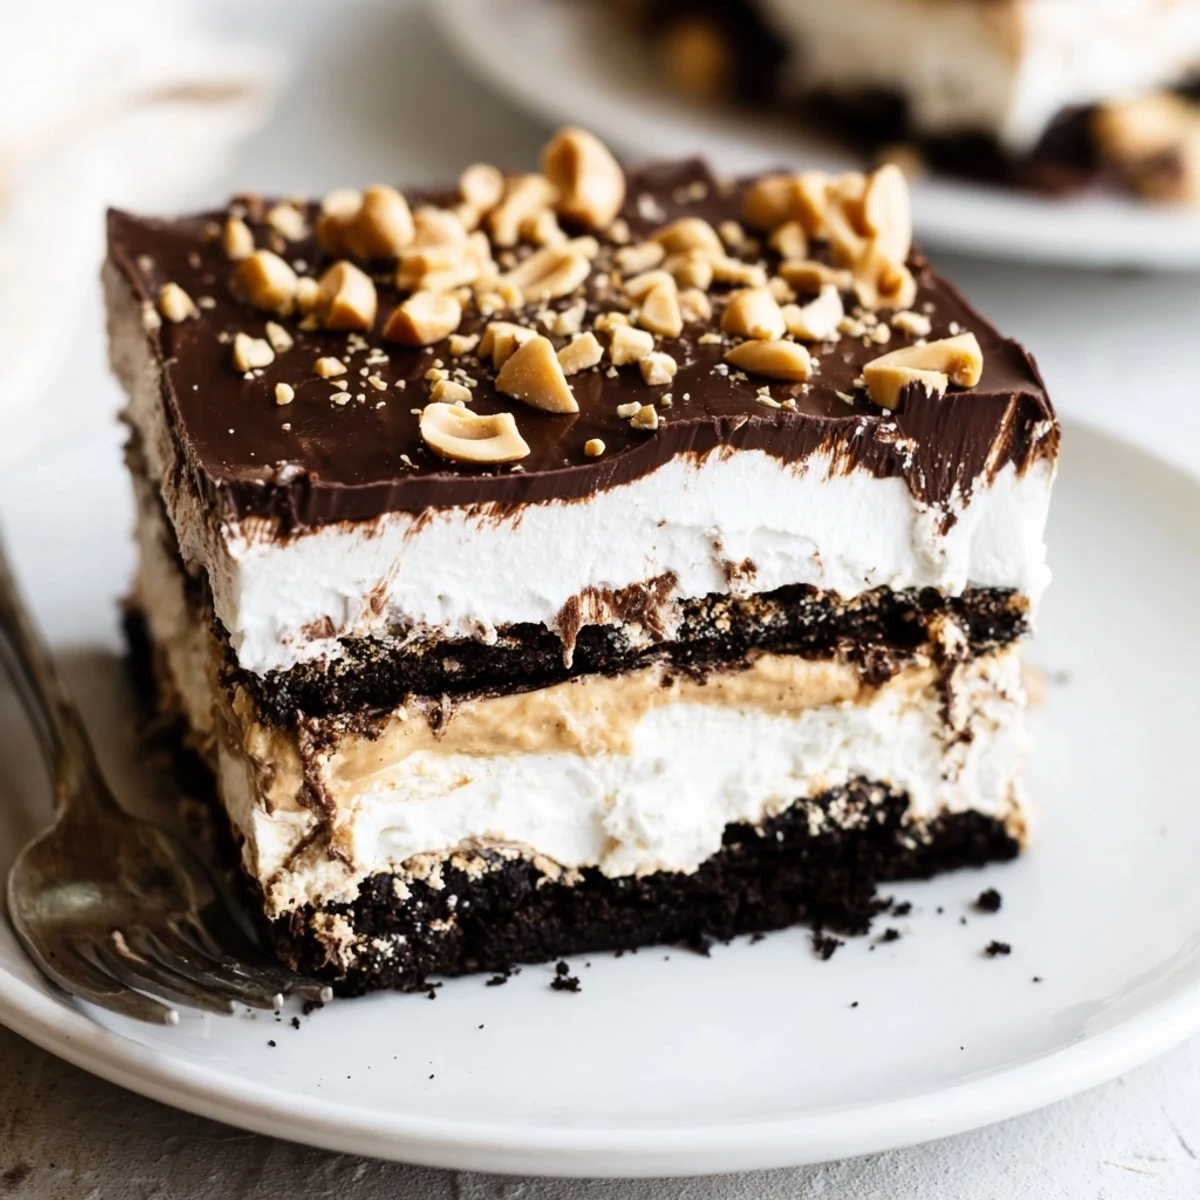
Save The real magic of this dessert reveals itself when you cut the first slice and the layers hold together perfectly, each one distinct but willing to share space with the others. It is the sort of dish that makes people ask for the recipe before they have finished their first bite.
Swaps and Twists I Actually Use
Crushed pretzels mixed into the cookie base add a salty snap that balances the sweetness beautifully, and I now prefer it over the plain cookie version. Almond butter works in place of peanut butter if you want something a little more delicate, though the flavor will be subtler. Gluten-free chocolate cookies make this accessible for friends with sensitivities, and honestly nobody can tell the difference in the finished dessert.
What to Serve Alongside
A tall glass of cold milk is the obvious companion, but a pour of tawny port or a scoop of vanilla bean ice cream turns a casual weeknight dessert into something that feels deliberate and a little fancy. I have also served small squares with strong black coffee after dinner, and the contrast between bitter and sweet is wonderful.
Storing and Making Ahead
This dessert actually improves after a night in the fridge, making it an ideal make-ahead option for gatherings. Keep it covered tightly and it will hold beautifully for up to three days, though the crust softens slightly over time. If you need to freeze it, wrap individual slices tightly and thaw them in the refrigerator overnight.
- Avoid storing near strongly scented foods, as the whipped topping can pick up odors.
- Do not leave it out at room temperature for more than an hour before serving.
- Always cut with a hot dry knife and wipe it clean between slices for the neatest presentation.
 Save
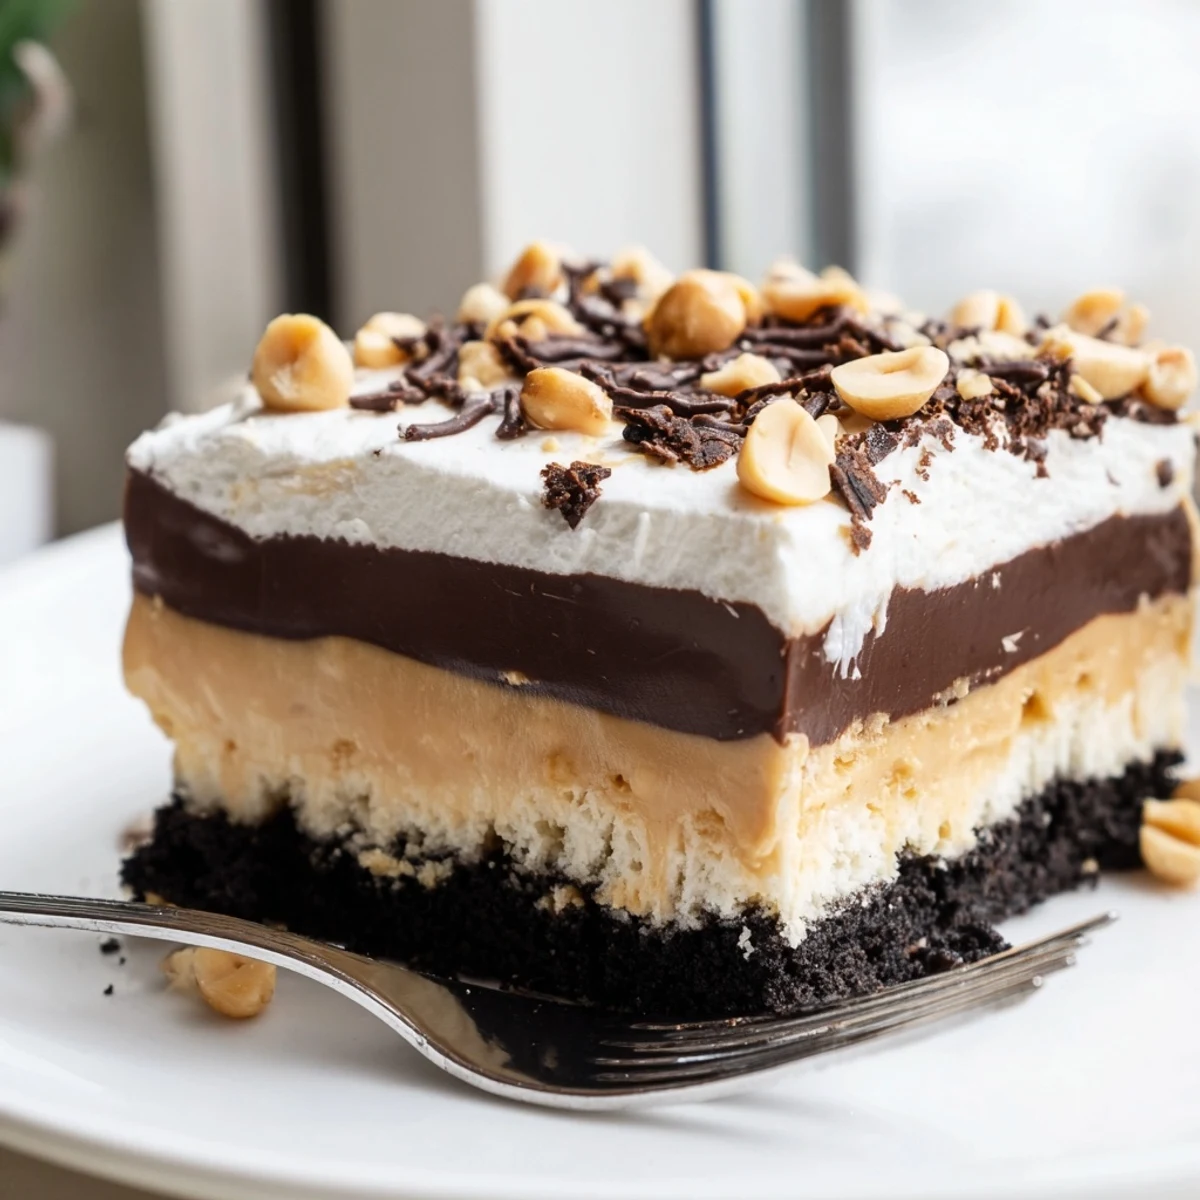
Save Every time I make this dessert, someone asks when I am making it again. That seems like the highest praise any recipe can earn.
Recipe Q&A
- → Can I make this peanut butter delight ahead of time?
-
Absolutely! This dessert actually benefits from being made in advance. You can prepare it up to 2 days ahead and keep it covered in the refrigerator. The layers set beautifully and the flavors meld together even more after an overnight chill.
- → What can I substitute for whipped topping?
-
You can swap the whipped topping with an equal amount of freshly whipped heavy cream sweetened with a tablespoon of powdered sugar and a splash of vanilla extract. Stabilize it with a teaspoon of gelatin if you want it to hold up longer in the fridge.
- → How do I get clean slices when cutting this dessert?
-
For neat slices, run a sharp knife under hot water, wipe it dry, then cut. Repeat between each cut. Also make sure the dessert has chilled for at least the full 4 hours so all layers are firmly set before slicing.
- → Can I use natural peanut butter instead of creamy commercial peanut butter?
-
Commercial creamy peanut butter works best here because it blends smoothly with the cream cheese and sugar. Natural peanut butter tends to separate and can make the layer grainy or oily. If using natural, stir it very thoroughly and consider adding an extra tablespoon of powdered sugar to help bind it.
- → Is there a gluten-free version of this dessert?
-
Yes! Simply swap the chocolate sandwich cookies for a gluten-free alternative. Many brands offer gluten-free chocolate cookies that work perfectly for the crust. Also double-check that your chocolate chips and peanut butter are certified gluten-free.
- → How should I store leftovers?
-
Cover the pan tightly with plastic wrap or transfer slices to an airtight container. Store in the refrigerator for up to 4 days. This dessert does not freeze well due to the whipped topping and cream cheese layers, which can become grainy when thawed.
